JAKA robots
This section of the documentation provides an overview of the typical operation of JAKA robots using RoboDK software to send a program to the JAKA robot controller app.
RoboDK supports all JAKA Zu robots and JAKA Zu app version 1.7.
As of the JAKA driver version 1.0.2 and JAKA post-processor version 1.0.1, the available features include:
1.Controlling the robot in real-time using the driver and “Run on Robot”.
2.Sending a program to the JAKA Zu app using the post-processor and “Send program to Robot”.
You can send a program to your JAKA robot controller in a few clicks from a RoboDK simulation.
You should follow these steps to load a program from RoboDK into JAKA Zu:
1.Launch the JAKA Zu app and connect to the robot in the JAKA Zu app.
2.Power on and enable the JAKA Zu robot.
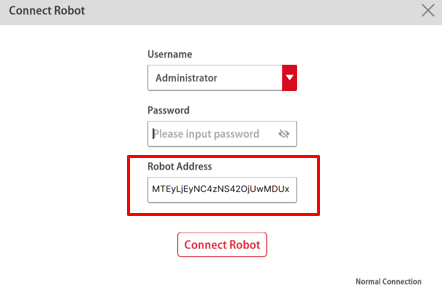
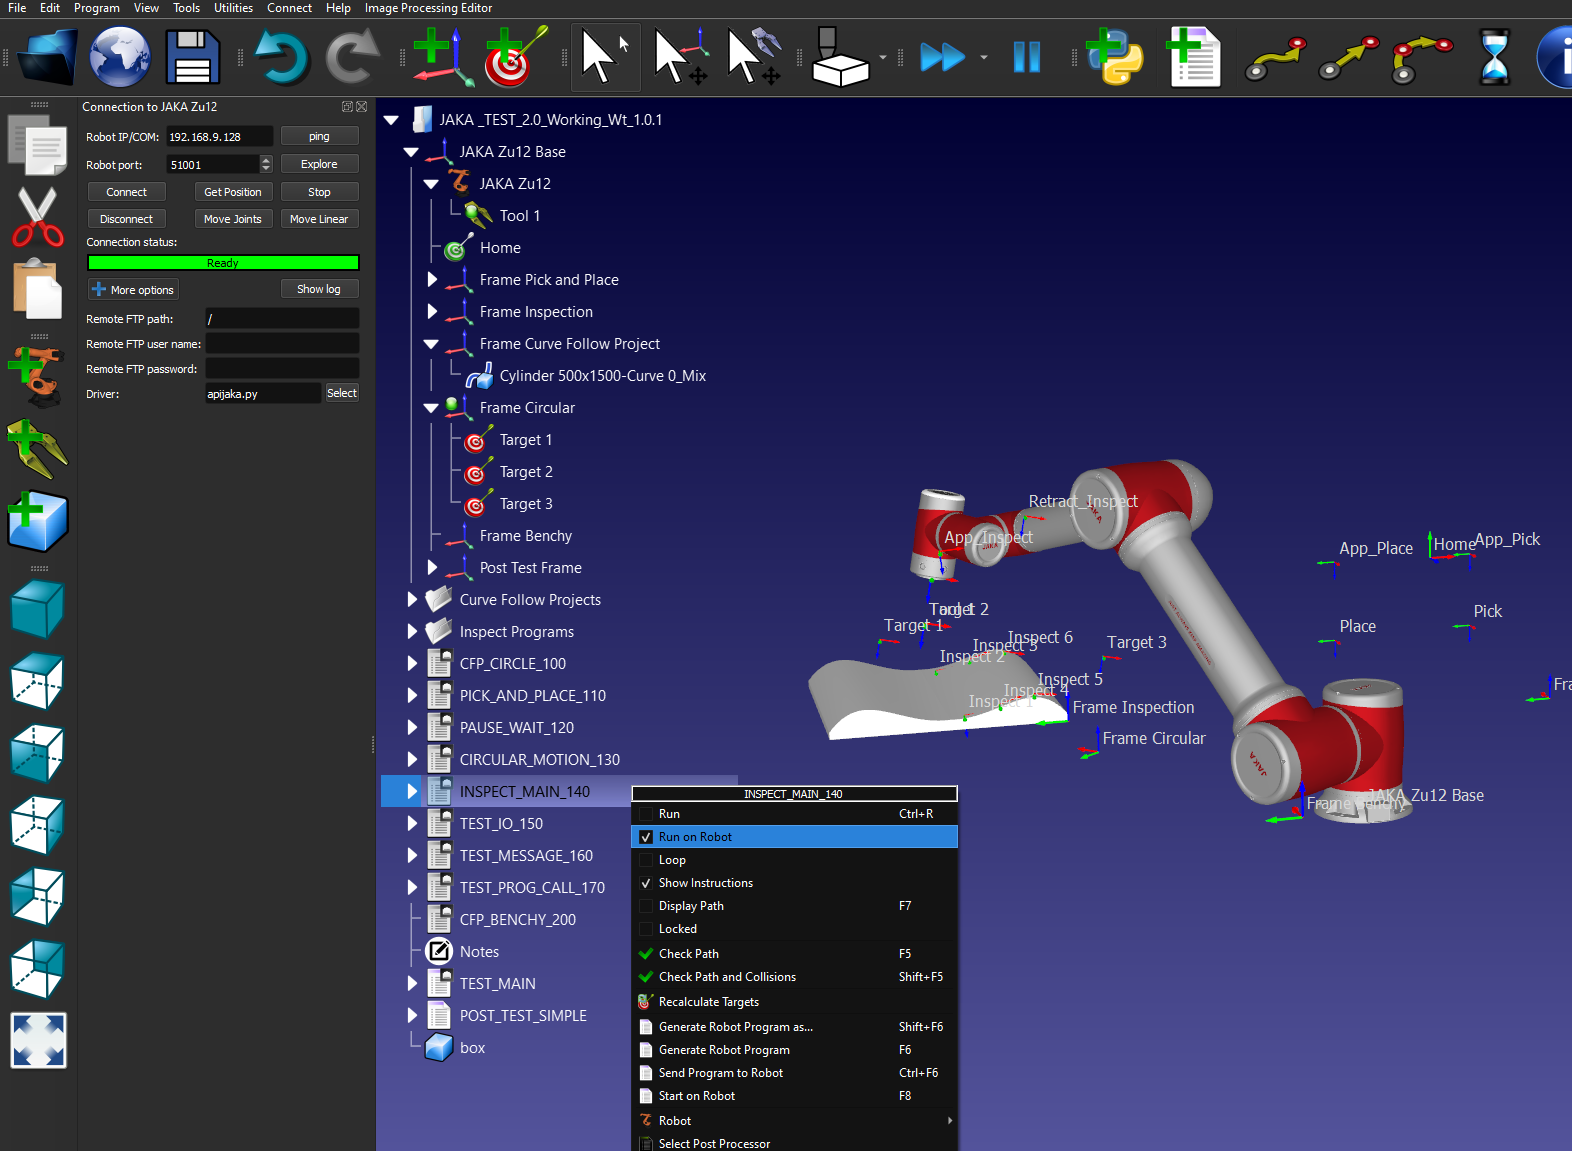
3.In the RoboDK toolbar, select Connect➔Connect Robot.
UnderMore options, make sure you have the JAKA driver selected: apijaka.py.
4.Use your robot IP and port to connect the robot in RoboDK.
5.Right-click the program you want to send to JAKA Zu and selectSend Program to Robot.
6.In JAKA Zu, navigate to the Programming Control tab.
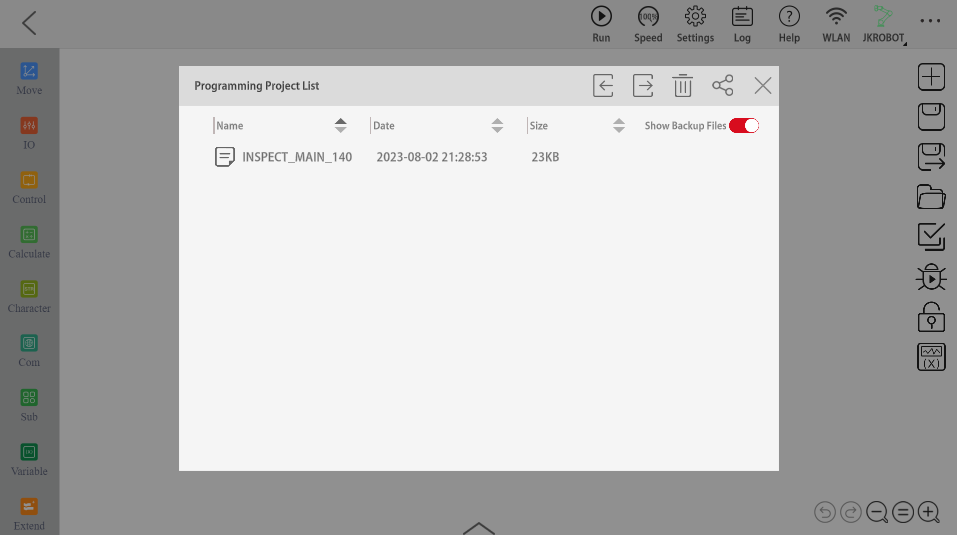
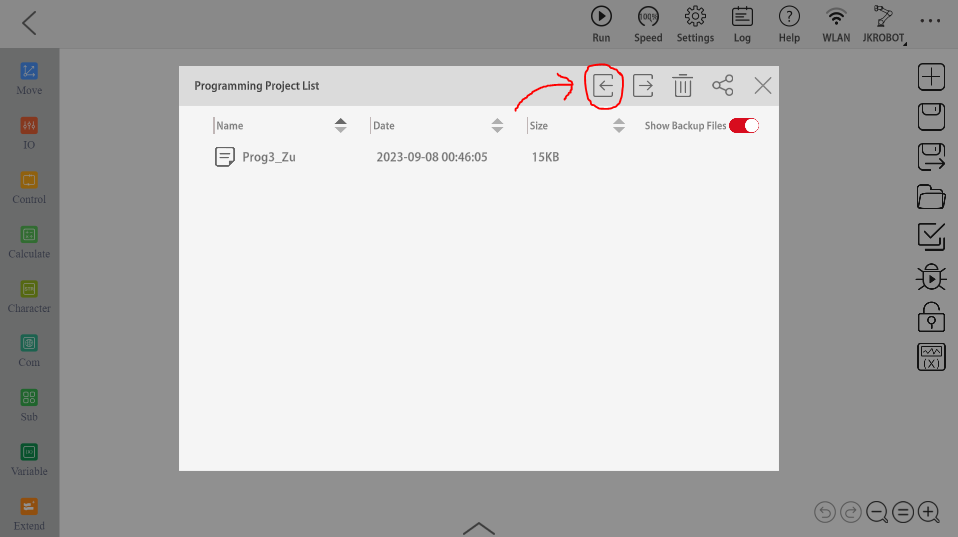
7.Open the Programming Project List by clicking the folder icon. Select the imported program.
8.Select “Confirm” on the “failed to open the programming file” message.
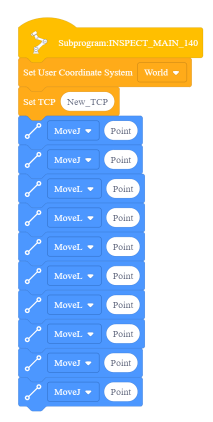
9.In the JAKA Zu programming control sidebar, navigate to Sub and locate the program in “Subprogram”.

Ensure that the program lock is turned off and drag the subprogram into the main program block.
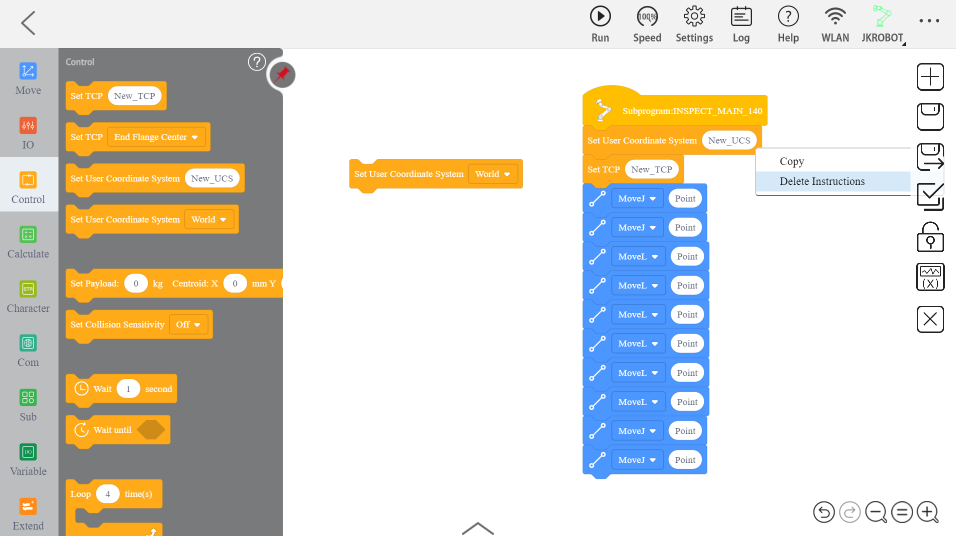
The imported reference frame may cause some issues. The following steps show how to set the robot reference frame in the JAKA Zu app.
1.Follow the steps listed inSend a Program to JAKA Zu.
2.Click on the subprogram to edit it.
3.Open the Control tab in the sidebar and locate the “Set User Coordinate System” tile containing the dropdown box.
4.Remove the “New_UCS” tile that was automatically imported by right clicking it and selecting delete.
5.Replace the removed tile with the “Set User Coordinate System” tile containing the “World” coordinate.
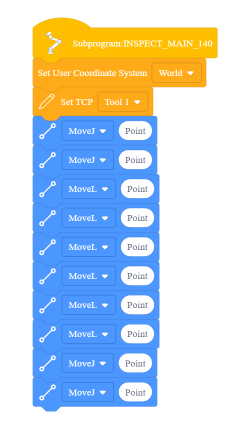
To set the robot TCP, the imported “New_TCP” tile must be replaced by the imported tool. The following instructions outline the steps necessary to achieve this.
1.Follow the steps listed inSend a Program to JAKA Zu.
2.Click on the subprogram to edit it.
3.Open the Control tab in the sidebar and locate the “Set TCP” tile containing the dropdown box.
4.Remove the “New_TCP” tile that was automatically imported by right clicking it and selecting delete.
5.Replace the removed tile with the “Set TCP” tile.
6.从下拉菜单中选择所需的工具。
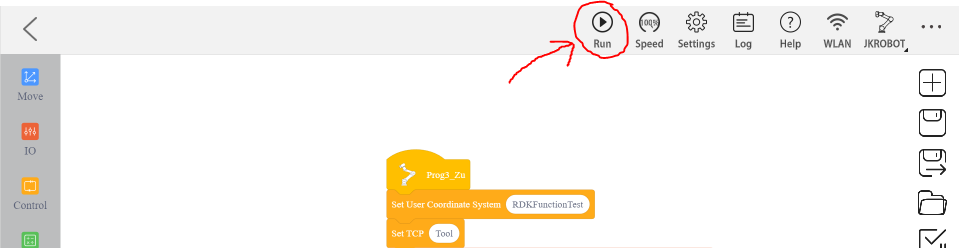
Follow these steps to start a robot program on a JAKA robot.
1.Follow the steps listed inSend a Program to JAKA Zu.
2.Set the reference frame and desired tool in the JAKA Zu app.
3.Save the subprogram and exit to the main programming control interface.
4.In the top toolbar, select “Run”.
![]()
![]()
![]()
Robot drivers provide an alternative to Offline Programming (where a program is generated, then, transferred to the robot and executed). With robot drivers, it is possible to run a simulation directly on the robot (Online Programming). More information available in theRobot Driverssection.
A connection between RoboDK and the JAKA robot can be established to move the robot automatically from a connected PC using RoboDK. This allows using the RoboDKRun on robotoption for online programming and debugging. The connection can be established through a standard Ethernet connection (TCP/IP).
Follow these steps to set up the RoboDK driver for JAKA online programming:
1.Launch the JAKA Zu app and connect to the robot in the JAKA Zu app.
2.Power on and enable the JAKA Zu robot.
3.In the RoboDK toolbar, select Connect➔Connect Robot.
4.Under “More options”, select the JAKA driver: apijaka.py.
5.Use your robot IP and port to connect the robot in RoboDK.
6.You can now move the JAKA robot directly from RoboDK
a.To move the robot to a target in RoboDK, double click the target in in the station tree and select the “Move Joints” or “Move Linear” buttons in the connection interface to effectuate a joint or linear move to the target.
b.To run a program on the robot using the driver, right click on the desired program and select the “Run on Robot” option. Then, double click the program to run it on the robot.